How to create Multi Step Form in WordPress
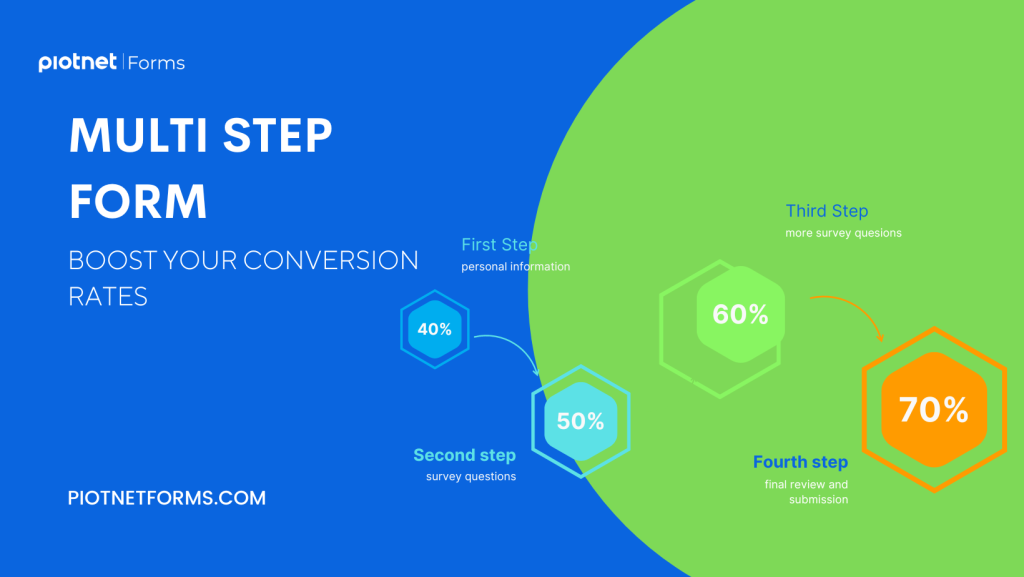
Multi Step Form allows you to divide a long form into many steps. Users should complete each form and click Next until they finish the last step and Submit. Multi-step form creates a better user experience and encourages users to complete long forms. This action helps you to get a much higher conversion rate.
In this article, you will learn how to set up a multi-step form by Piotnet Forms.
Step by step to create a multi-step form
In this example, we have a travel questions form. We will divide this form into 3 steps
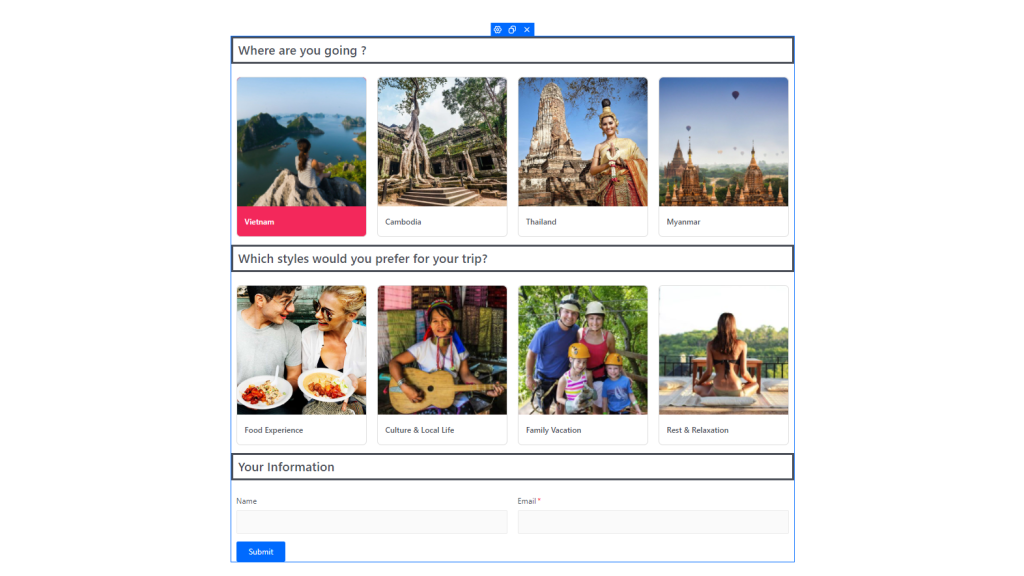
Assemble essential widgets
To divide the form, you need to use the Form Step widget.
Drag and drop the widget into places where you need to put an end for each step. In this example, I put 2 Form Step widgets between the 3 questions to divide the form into 3 parts.
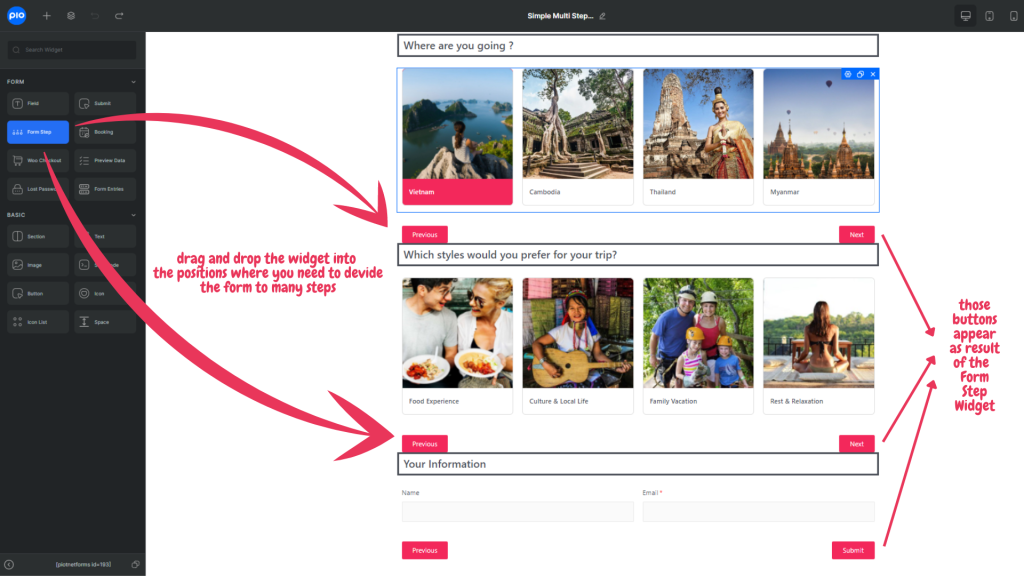
Since the Form Step widget automatically creates submit button, you can remove the primary submit button.
Basically, your multi step form is completed now.
Options
There are many options in the multi-step form feature for the demand of customization.
Edit the Multi-Step Start widget to open these options:
- Disable the Progress bar: Show/hide the progress bar.
- First Step Title: Name the first step.
- Scroll To Top: Auto scroll to the top of the form step after clicking next – useful for the long form.
- Negative Offset Top: Setup default distance to the top of the page after the auto-scroll is triggered.
Edit the Form Step widget to open these options:
- Disable buttons: Disable the Next and Previous buttons. Activate this option if you choose to use the alternative button.
- Press enter to go to the next step: Enter instead of clicking the button to move to the next step.
- Next step title: name the step after the Form Step widget.
- Buttons tab: Show/hide and change the text inside the buttons.
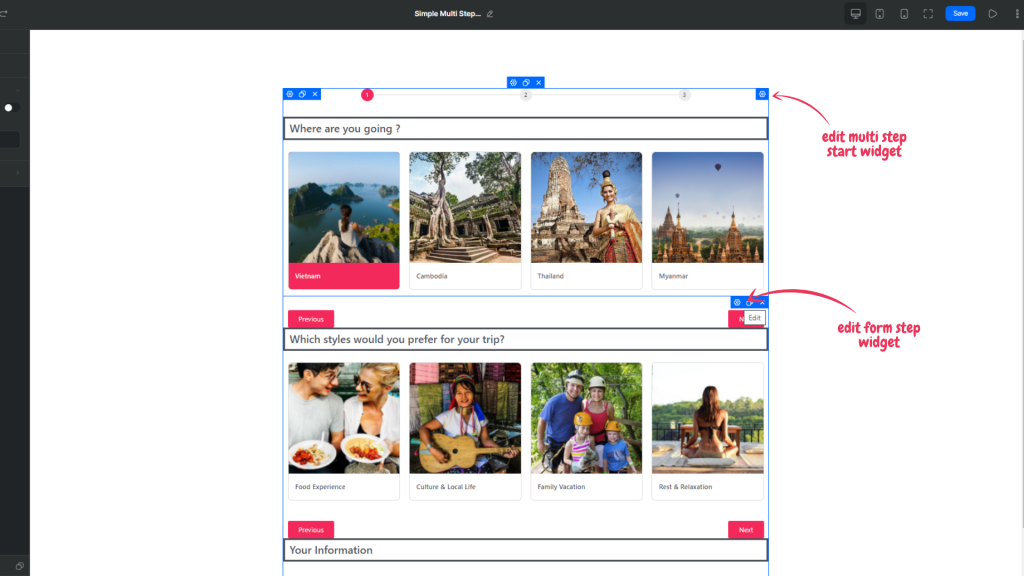
Edit the Multi-Step End widget to open similar options and to set Action After Submit
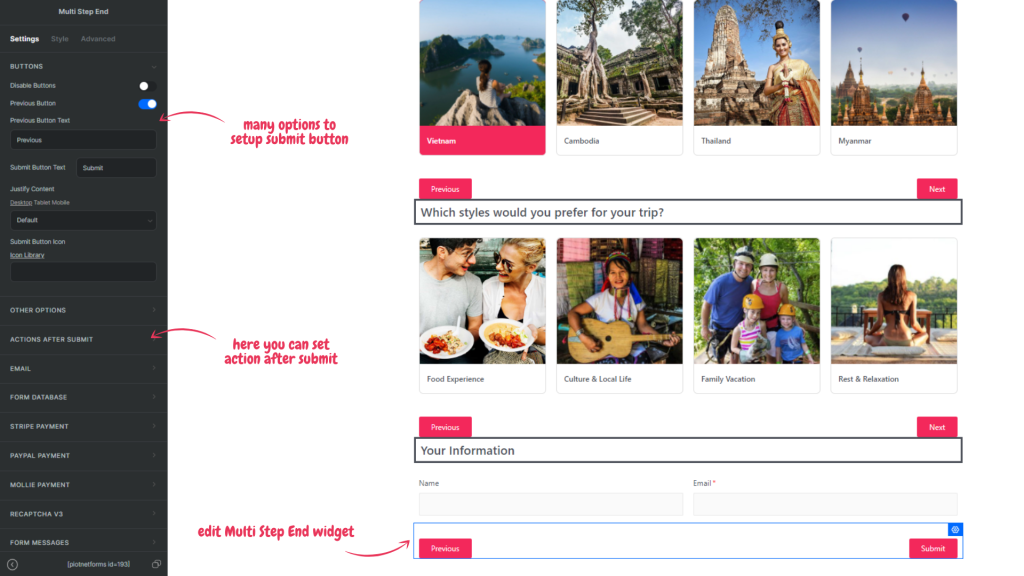
Still more in the Style and Advanced tab of the control for your choice.
Alternative Button
Besides our default multi-step form Next/Previous buttons, the feature also offers an alternative button: set other elements to play the role of Next and Previous buttons. The elements could be text, images, icons, etc.
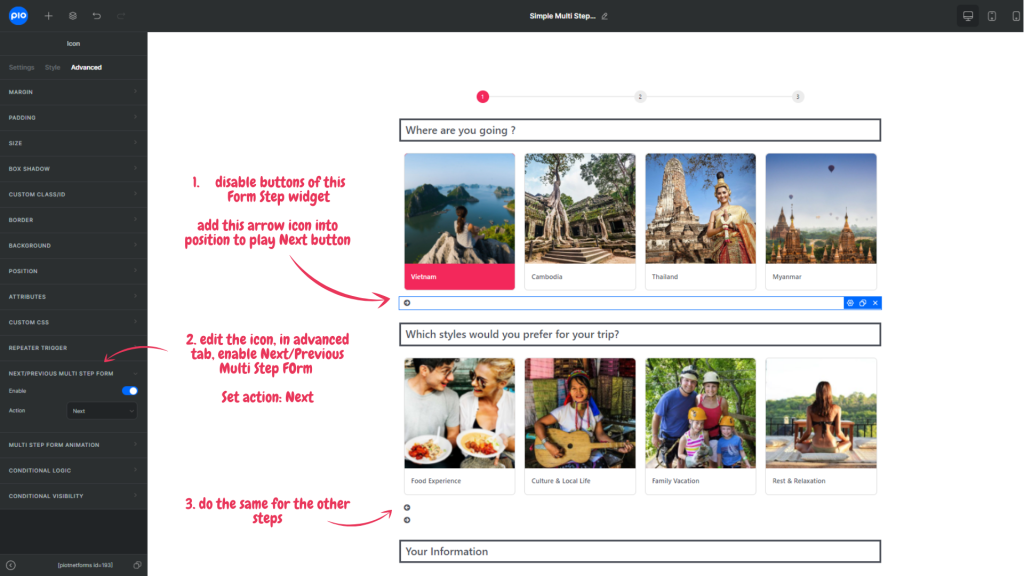
Back to the example, I will replace the default next/previous buttons with arrow icons:
- Edit Form Step and Disable Buttons, Edit Multi Step End, and Disable Previous Button.
- Add arrow icons into the positions
- Edit the icons, in the advanced tab. Enable the Next/Previous Multi Step Form, and set suitable actions for the icons: Next or Previous.
Now I have this result in step 2 (the same for other steps):
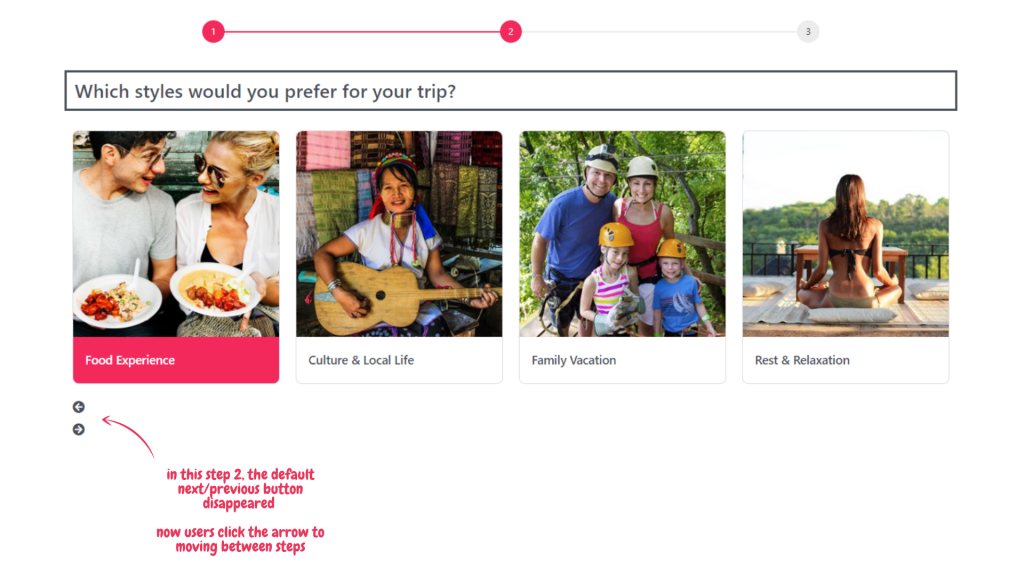
The alternative button is very useful for customizing multi-step form style.
—
For Elementor users, you may try the same feature in Piotnet Addons for Elementor.
See another feature of Piotnet Forms: Repeaters field multi level nested.

