
MailChimp
Integrate Mailchimp vs Piotnet Forms
Once logging into Mailchimp, access your Account page.
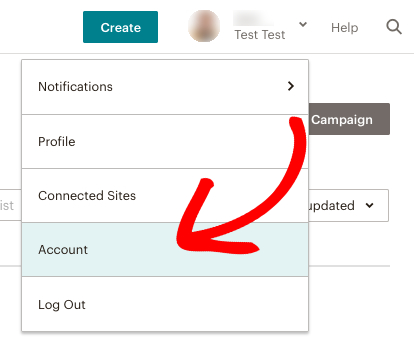
Within the Account page, you’ll see an additional menu near the top of the page.
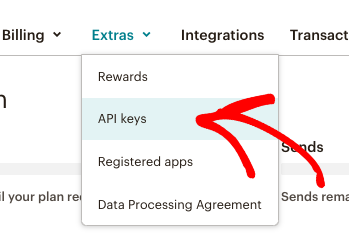
From this menu, you’ll need to go to the Extras » API keys
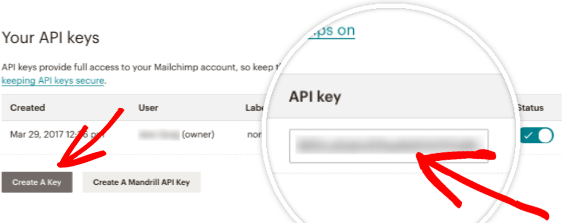
When opening the API Keys page, you’ll be able to copy your existing API key or, if needed, generate an API key by clicking the Create a Key button.
Copy this Mailchimp API Key
After you’ve copied the key, you can return to the tab or window with your Piotnet Forms settings and paste it into the API Key field.
Go to Dashboard > Piotnet Forms > Settings > MailChimp Integration > Enter MailChimp API Key > Save Settings

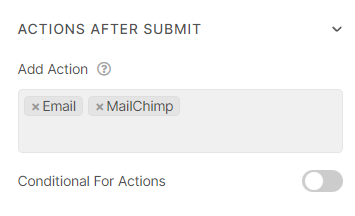
Mailchimp Action Settings
On your form, click “Submit Button” > Select Action After Submit > Add “Mailchimp” Action
Then scroll down to Mailchimp action part > fill out the parameters
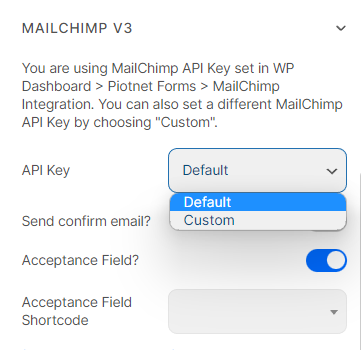
API Key:
- Default: API Key which you added in the step above
- Custom: you need to enter Custom API Key information
Acceptance Field Shortcode: Create an option for customers to choose if they want to register to receive notification emails from the business,
-> Create an Acceptance field, then copy shortcode of the field and paste it into the Acceptance Field Shortcode.
If customers clicks agree, their information would be saved to the Mailchimp API. Otherwise, information would not be saved.
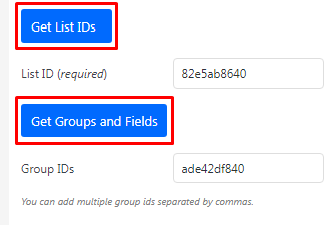
“Get lists IDs” and “Get Groups and Fields”
-> Click on the GET LIST IDS -> All your List IDs will be queried and displayed -> Choose one and fill out to “List ID (required) box
Similar way, click on “Get Groups and Fields” -> fill out your target “Group IDs”, multiple Groups are separated by commas.
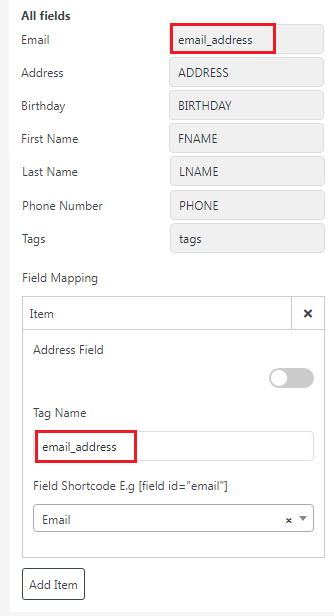
Field Mapping:
After acquiring the FIELDS taken in step 5, you need to map the fields corresponding to the shortcode.
Copy the email field from All fields ’email_address’ and paste it to Tag Name
Note:
- For the address field you need to enable the Address Field then enter the Tag Name as ‘ADDRESS’ and the necessary address information.
- City Field Shortcode, State Field Shortcode, Zip Field Shortcode, Country Field Shortcode are required in the Address Field