
Conditional Visibility
The Conditional Visibility feature empowers you to dynamically control any elements which are visible on your WordPress Websites and who can see them, which includes the ability to schedule them.
Furthermore, you can add multiple visibility conditions (show/hide) by User Level Roles, Custom Fields, URL Parameters, URL Contains, and URL Equal.
Edit Any Widget or Column/Section > Advanced Tab > Conditional Visibility
How to set up conditional visibility and applications
1. Visibility for Users
You can customize the roles to show any widget or form.
For instance: You have a travel blog, and there is a statistical table of all authors’ performance. How do you hide this table from normal visitors? This option will meet your need, you can set roles who can see this table.
You can set simultaneously multiple roles: All, Non-Logged, Logged In, Administrator, Editor, Author, Contributor, Subscriber, etc.

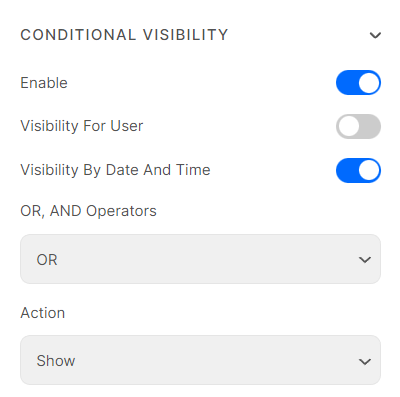
2. Visibility by Date and Time
Depending on your Date and Time setup, this feature allows any widget or Form to be visible
For example, you can apply this feature to Food Menu if the Food list every day is different
- OR, AND Operators: set relation between conditions. You can enable AND/OR settings during form creation.
With the “AND” option, two or more requirements must be met by the site visitor in order for the condition to show/hide. On the other hand, for the “OR” condition to work, a condition will show/hide so long as one or more of the requirements are met. - Action: Show or Hide
- Item: Customize the Day and Time ranges by “Choose day”, “Start Date”, “End Date”, “Time Start”, or “Time End”.
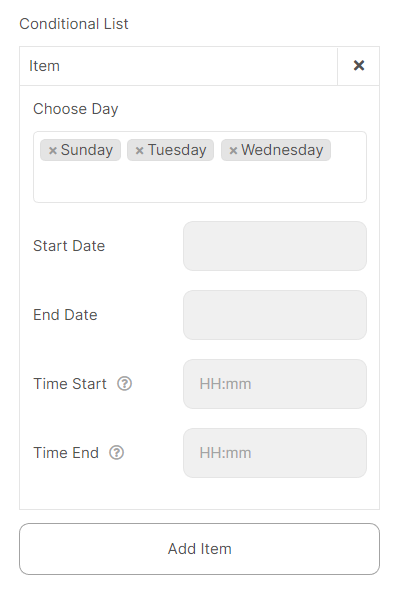
Notice: These date and time ranges comply with your Server’s time zone setup.
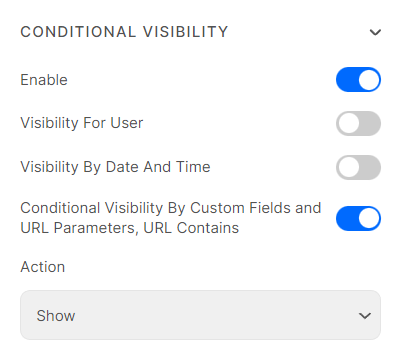
3. Conditional Visibility by Custom Fields and URL Parameters, URL Contains
You need to choose the appropriate Show/Hide action for your elements or Layout formats.
Reply on valid input values, this feature will be triggered as your custom setup.
For instance: your Website specializes in Car Trading, and you desire to show a contact form for Mercedes Models Posts. You can achieve this idea when putting form in “Single Post Template” and setting up one of the four sub-options below.
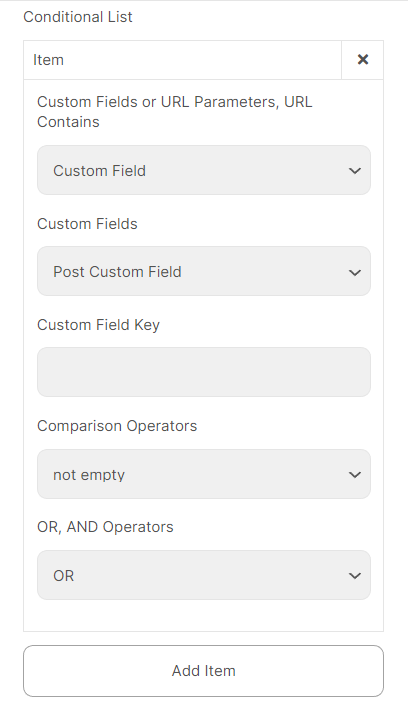
3.1 Custom Field
- Choose “Custom Field”
- Custom Fields: Support for Default Post Custom Fields and ACF fields.
- Custom Field Key: Fill in your corresponding custom field key.
- Comparison Operators: There are various options: Not empty, Empty, Equals, Not equals, >, >=, <, ≤, True, False, Contains (ACF Checkbox)
- OR, AND Operators: Set the relation between conditions.
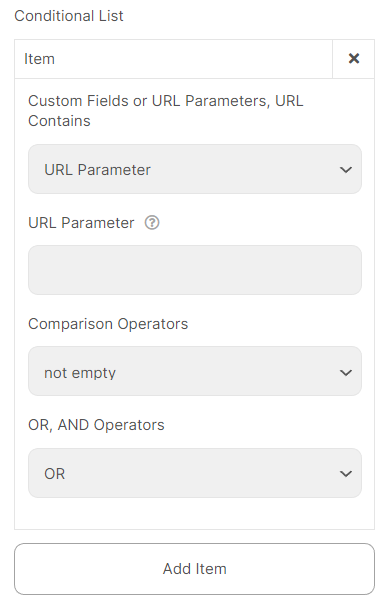
3.2 URL Parameters
- Choose “URL Parameter”
- URL Parameter: Fill in your desired URL Parameter.
For example, abc=run (Full Site URL: https://piotnetforms.com/?abc=run) - Comparison Operators: There are a variety of options: Not empty, Empty, Equals, Not equals, >, >=, <, ≤, True, False, Contains (ACF Checkbox)
- Type Value: String or Number
- Value: Fill in your desired value.
- OR, AND Operators: Set the relation between conditions.
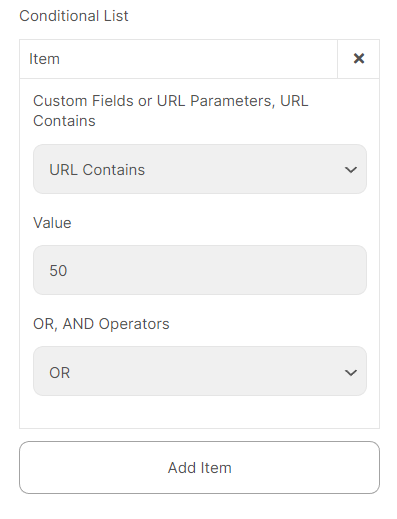
3.3 URL Contains
- Choose “URL Contains”
- Value: for example, /page-slug/
- OR, AND Operators: Set the relation between conditions.
For another conditional feature of Piotnet Forms: Conditional Logic