
Zoho CRM
Zoho CRM is a tool to store customer information, provide customer management, automated marketing, enterprise development solutions, and departmental systems
Tutorials to send data to Zoho CRM
Step 1: Connect Zoho CRM vs Piotnet Forms
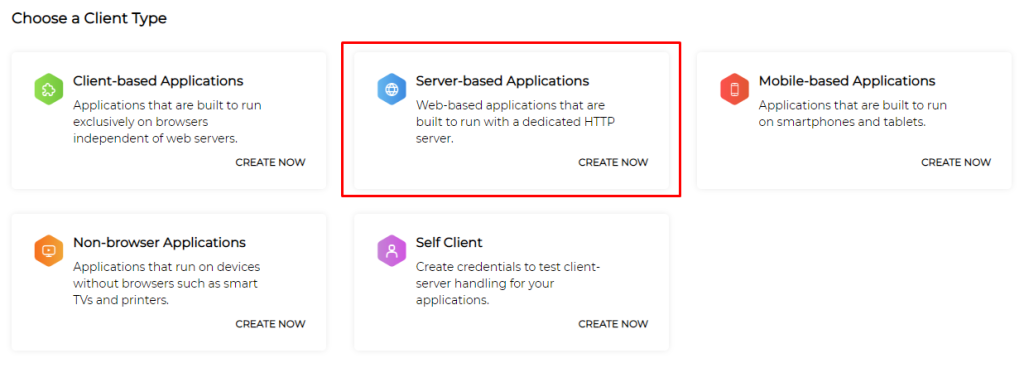
Access Zoho CMR website -> login your account -> https://api-console.zoho.com/ > Add Client > select Server-based Applications.
- Client Name: Enter Client Name
- Homepage URL: https://your-domain.com
- Authorized Redirect URIs: https://your-domain.com/wp-admin/admin.php?page=piotnetforms
Access the admin page: Piotnet Form >Settings > Zoho Integration
Select the appropriate Domain and fill in the Client ID and Client Secret information -> click Save Settings to save the changes.
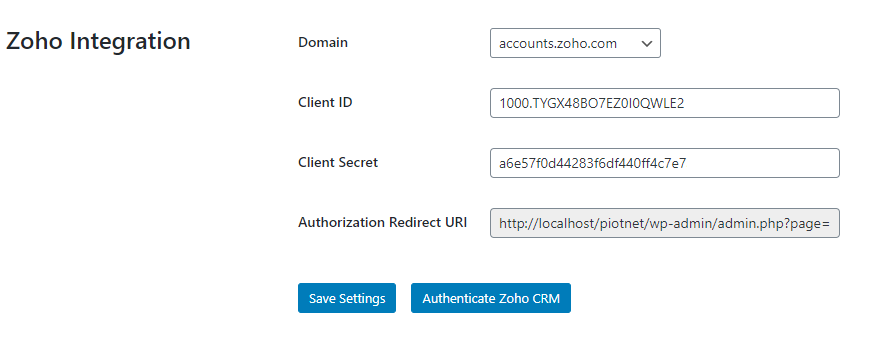
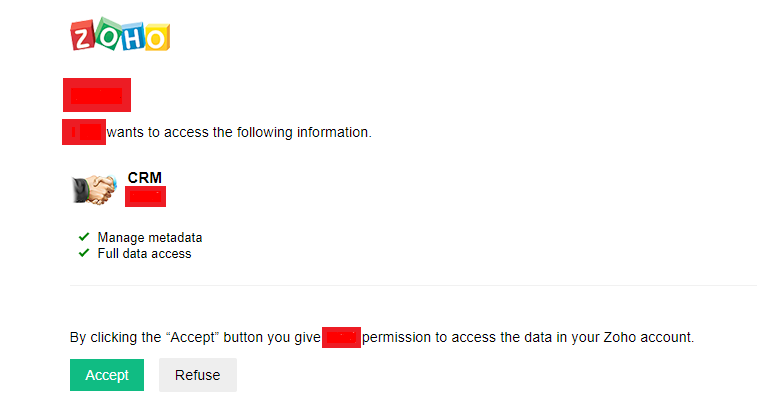
After saving the valid information, click Authenticate Zoho CRM to confirm access.
Domain: You must use your domain-specific Zoho Accounts URL to generate access and refresh tokens. The following are the various domains and their corresponding accounts URLs.
- For US: accounts.zoho.com
- For AU: accounts.zoho.com.au
- For EU: accounts.zoho.eu
- For IN: accounts.zoho.in
- For CN: accounts.zoho.com.cn
- For JP: accounts.zoho.jp
Step 2: Create your own form
Create a form to collect necessary information
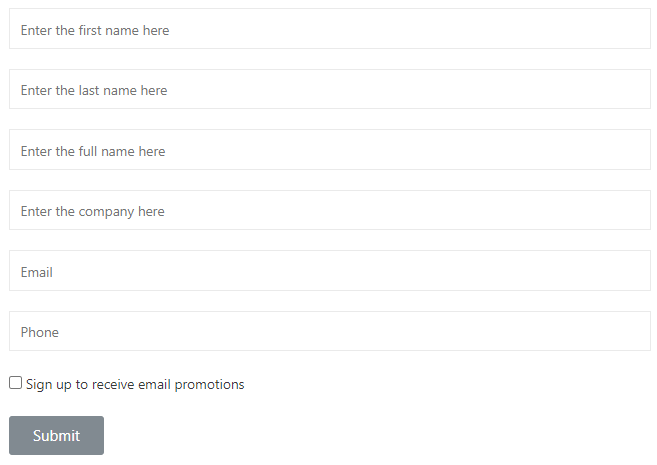
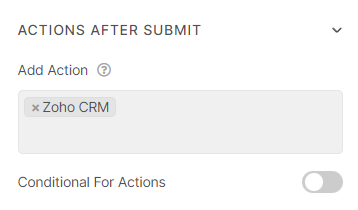
Click submit button -> Actions After Submit -> Add Action, select Zoho CRM.
Step 3: Config Zoho CRM action
In Zoho CRM section select the appropriate module to save customer information. Then click GET TAG NAME. The list of Tag Name will be displayed.
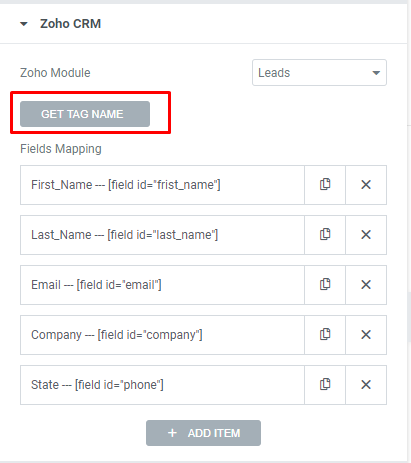
Mapping the fields and the corresponding shortcode to save information into Zoho CRM.
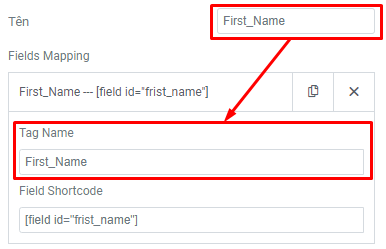
Example (Field First Name):
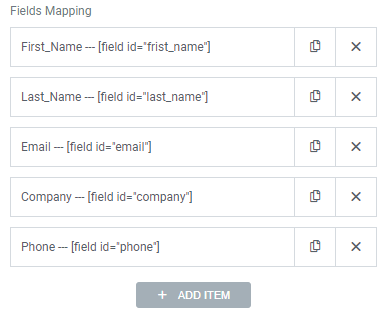
Completed all fields mapping
Check form activity.
Notice: while inserting records, there are a few system-defined mandatory fields that you need to mention. In order to successfully insert records in Zoho CRM, make sure you enter user-defined mandatory fields too.
Please refer to System-defined mandatory fields for each module