Email Actions
Email and Email-2 actions allow you to assign where the form is sent to and customize the data that is sent.
Demonstration
How to configure email actions
Step 1: Create your own form
Create a simple contact form with Piotnet Forms
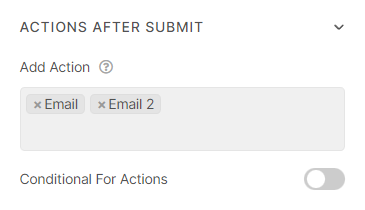
Click on Submit Button -> Action After Submit -> Add “Email” or “Email 2” actions
Step 2: Application and difinitions
Application
What are “email” and “email-2” actions?
- Email: Send Input Information to the Admin via email.
- Email 2: Send Email Confirmation to the User who submitted the Form. Email2 is very useful; for example, it could be a confirmation email received by your site’s visitor – immediately after he sent a form on your site.
Definitions
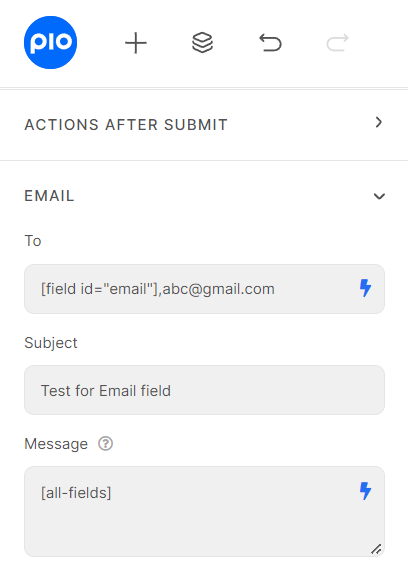
- To: Enter the email address of the recipient of the form, you can embed the shortcode of field (example as an above illustration). You can use multiple email addresses by separating commas.
- Subject: Enter the text you desire to be displayed in the subject of the email
- Message: Here you may use the shortcodes of your form to create the message sent by the form. By default, the “all-fields” option is used.
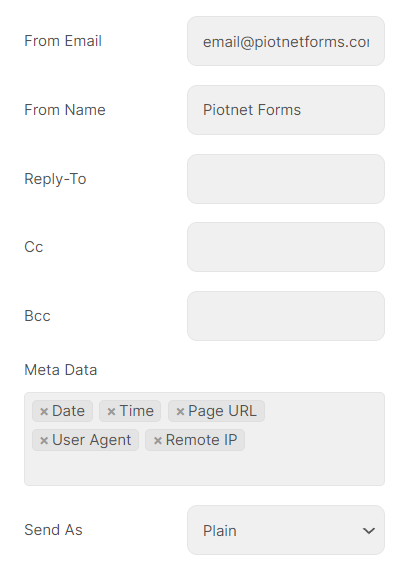
- From Email: Enter the address of the sender or use a noreply@
- From Name: Enter the name, title, or company you wish to show in the email
- Reply To: Enter the address of the sender or use a noreply@
- Cc: Enter the email address of the recipient to be Cc’d (carbon copy)
- Bcc: Enter the email address of the recipient to be Bcc’d (blind carbon copy)
- Meta Data: Here you may add or remove additional metadata that is displayed at the bottom of the form. By default, all options are displayed
- Send As: in the dropdown, select whether to send the form as HTML or Plain text.
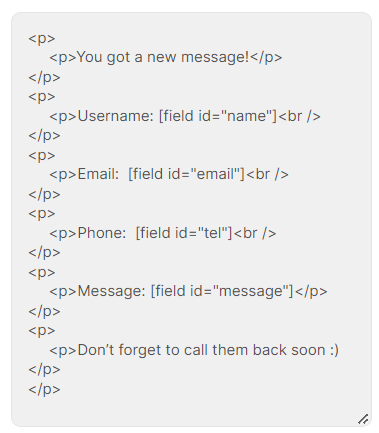
Example of Email content