
Elements of Piotnet Forms
In this article, you will learn about major elements of Piotnet Forms in WordPress Dashboard. After installing Piotnet Forms, the plugin would appear on the left side of the dashboard menu of your page. There are 8 tabs:
- All Forms
- Add New
- Import
- Database
- Abandonment
- Booking
- Custom Font
- Settings
All Forms
Store all of your created forms.
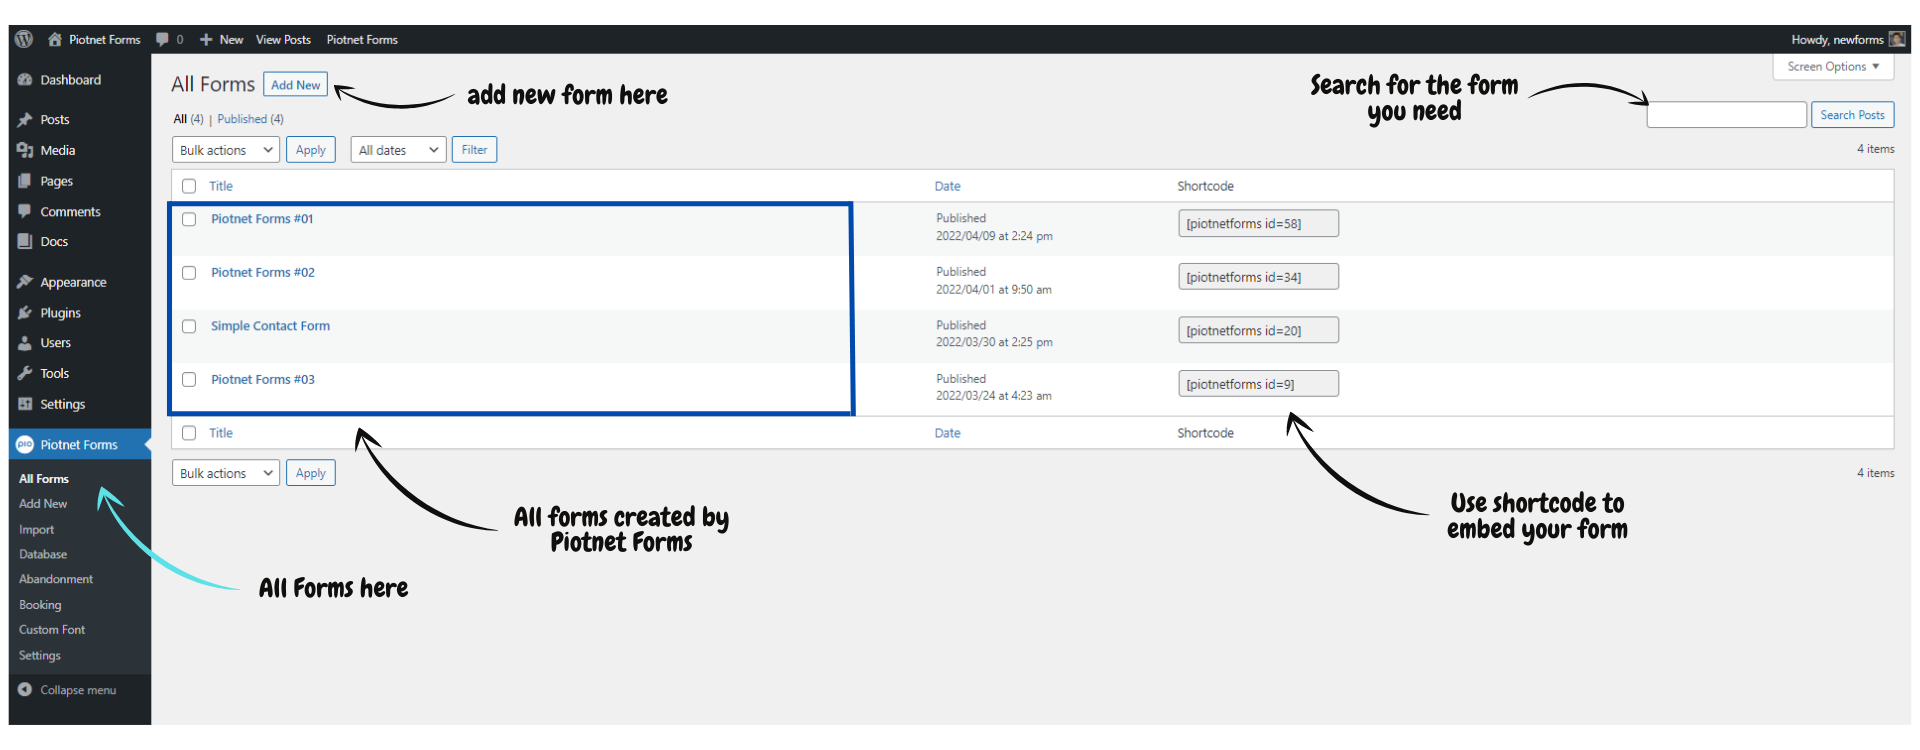
All Forms category is in the first place. Here you can see the Name, Published Date, and Shortcode of the forms.
You can do some actions like add new form, edit form, export, duplicate, move to trash, etc.
Shortcode is useful for embedding into pages.
Add New
Add new forms to your site.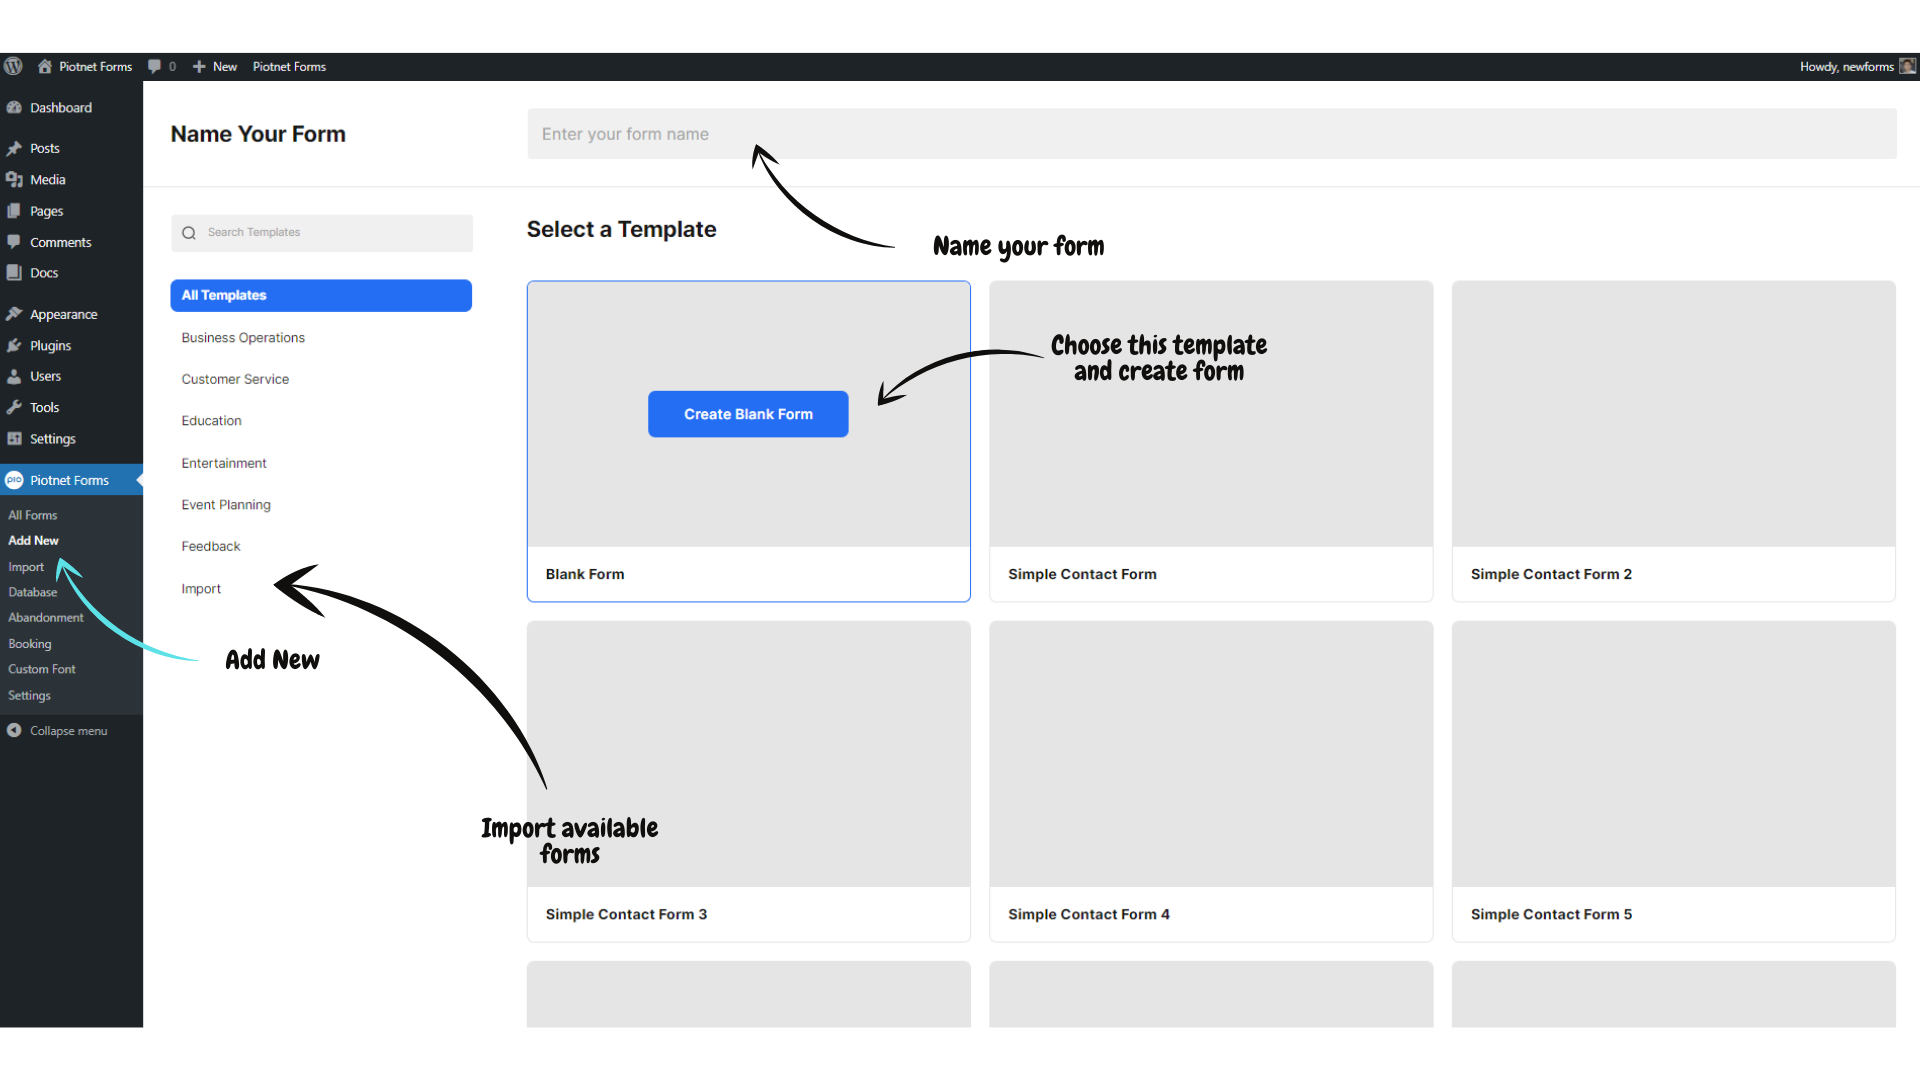
Choose a template to start. You can start from a blank form or select one of the built-in templates.
Click Import to upload JSON file.
Import
Import an available form template. JSON file is mandatory
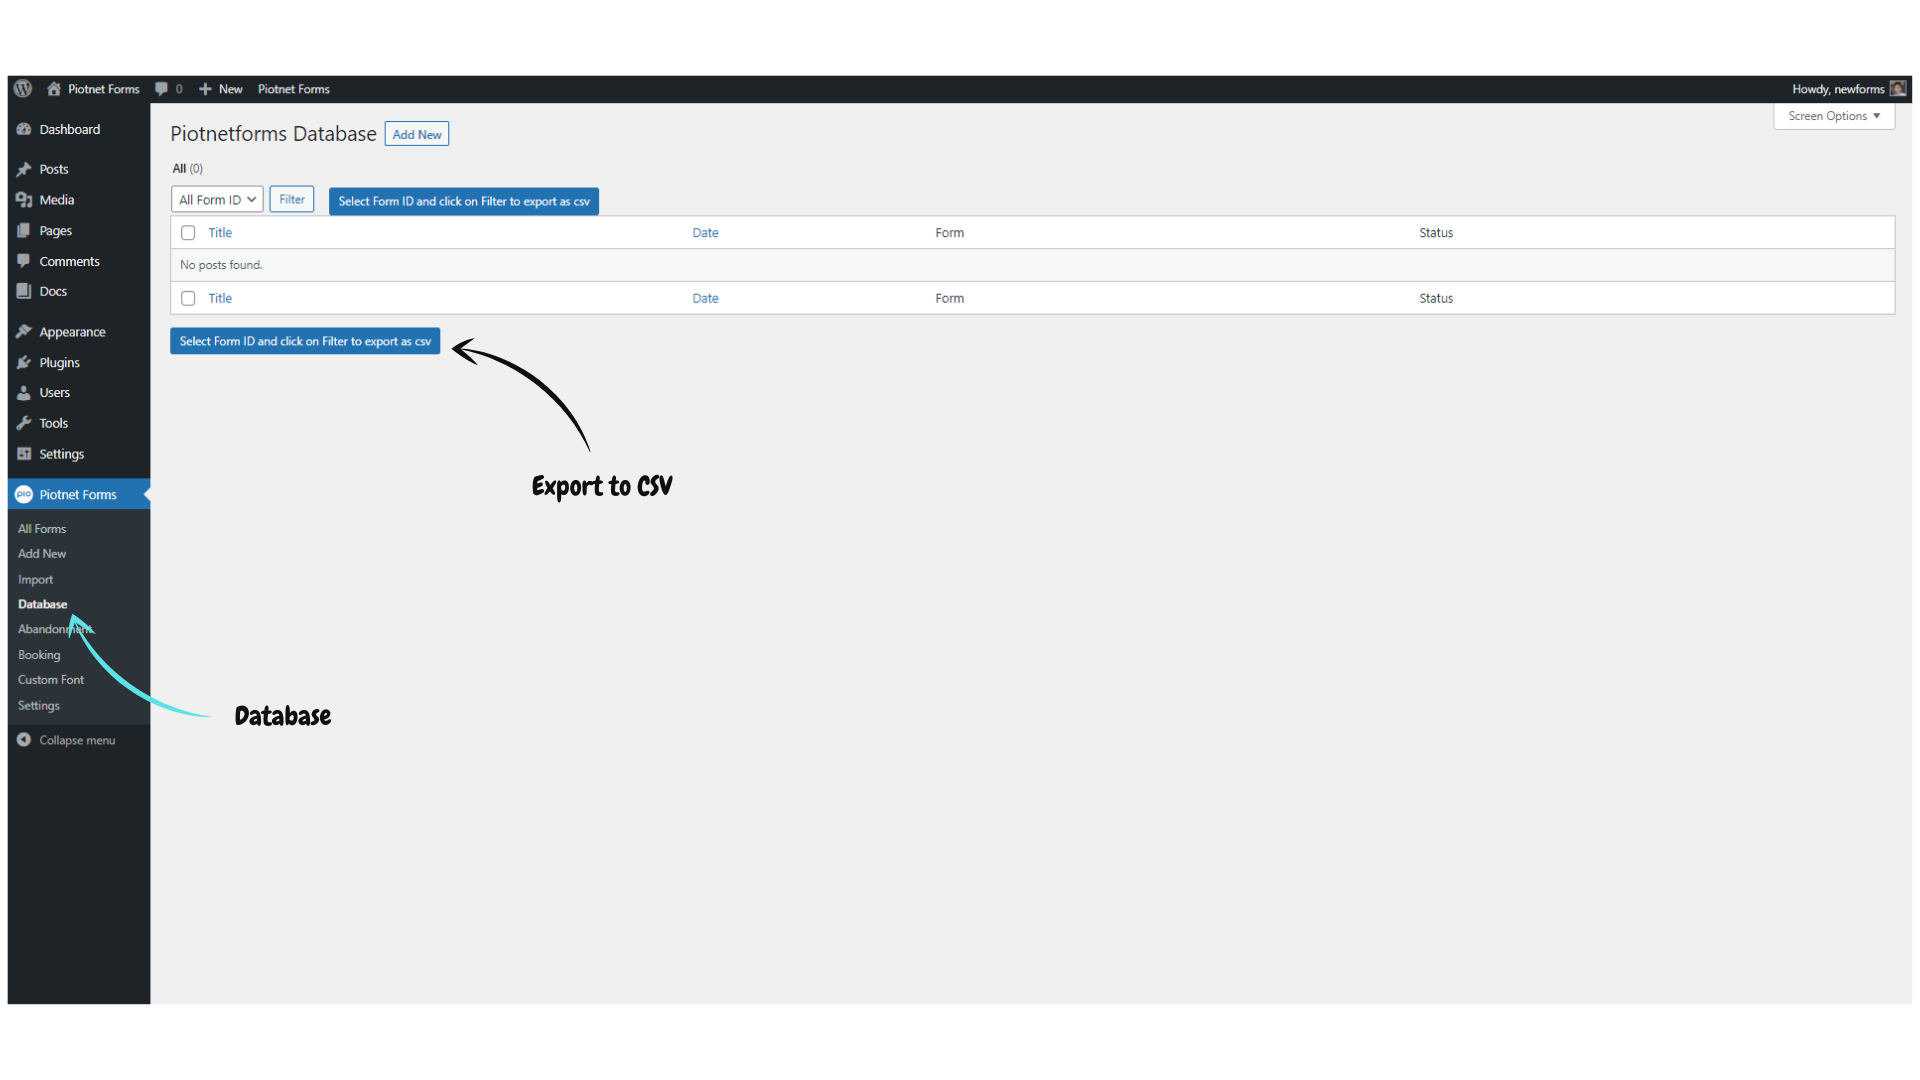
Database
The database stores all information submitted via Piotnet forms on your site.
You can choose Posts to export as CSV. Use the filter tool to filter by form ID, and time duration.
View post to see, edit or delete submitted information
Abandonment
Store posts collected by Forms Abandonment.
Booking
Store all created Booking forms.
Custom Font
Add your favorite fonts to PDF Generator. Download fonts from Google fonts and import TTF file into the database.
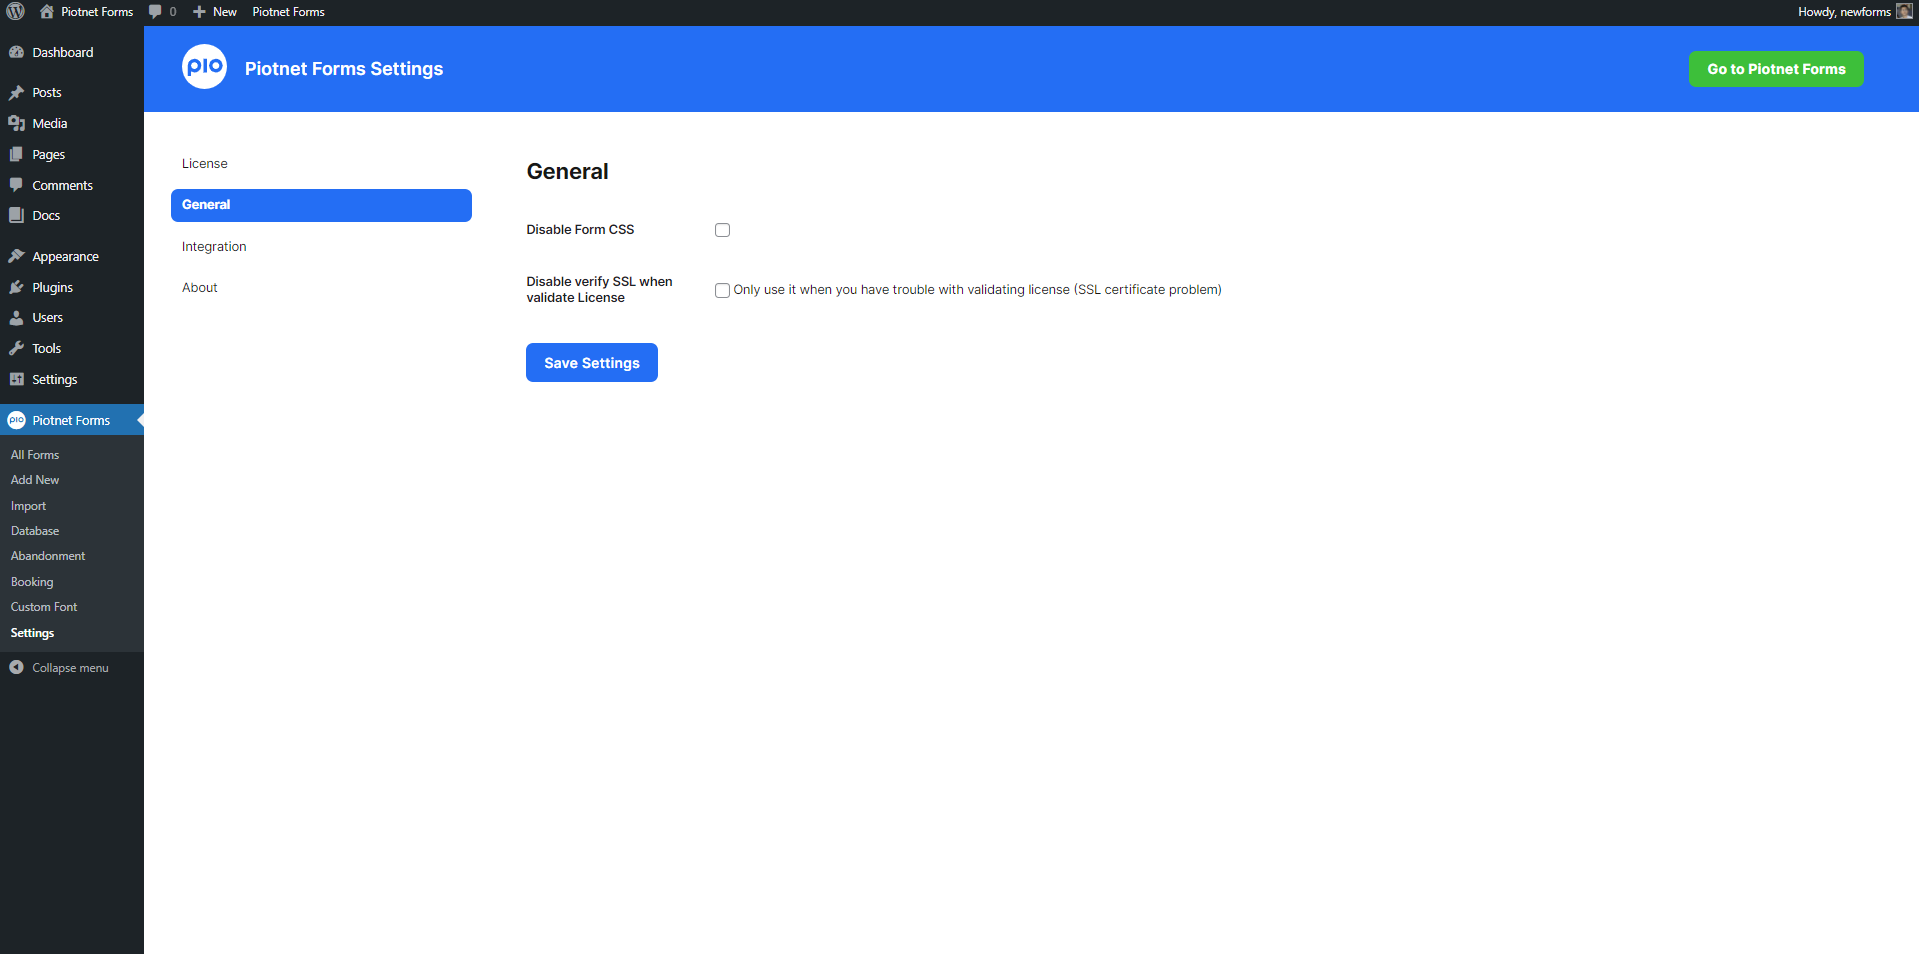
Settings
Change the overall settings of your Piotnet Forms.
There are 4 tabs: License, General, Integration, About
- License: Manage your license
- General:
Select if you want to disable form CSS
Select if you want to disable verify SSL when validating License
- Integration:
Manage and setting your third parties integration.
Assign Client ID, Clent Secret, API Key, etc. - About:
Find our support information here.