ActiveCampaign Integration and Usage
Piotnet Forms ActiveCampaign is an action after submit. The feature use API port of ActiveCampaign to submit customer information. Following are steps to use ActiveCampaign of Piotnet Forms.
Step 1: Create a form with the necessary information

Create Form
Step 2: Click the Submit button, select Actions After Submit-> Add Action, select ActiveCampaign.

Add action ActiveCampaign after submit
Step 3: In the ActiveCampaign section select API Credentials
– If it is Default, you need to enter Campaign URL and Campaign Key information in the Piotnet Forms Settings: Piotnet Forms-> Settings-> ActiveCampaign Integration

Add API Key and API URL in admin page
– If it is Customs, there will be 2 text boxes to enter Campaign URL and Custom API Key.
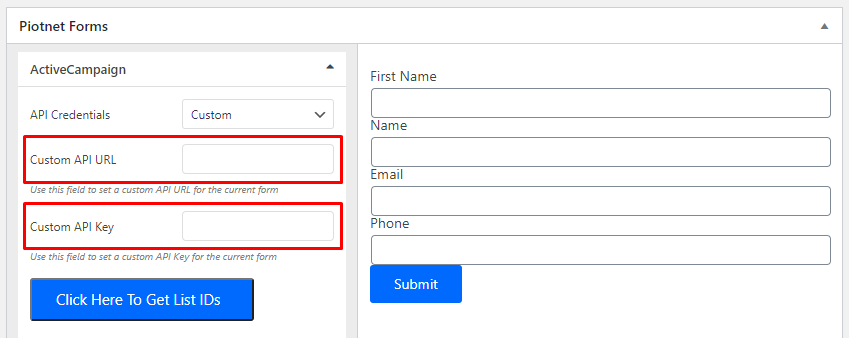
Add Custom API URL and Custom API Key
Step 4: Click the Click Here To Get List IDs button to get the list of Campaigns.

Get List ID Activecampaign
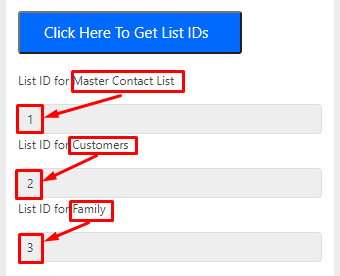
Name list and ID after get
Step 5: You need to select the appropriate List ID taken in step 2 to enter the List ID * (Required) field. After changing the Tag Name List will reload.
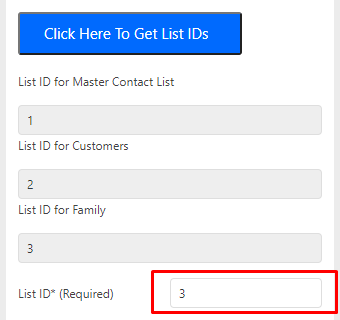
Enter List ID before get
Step 6: Add Item Field Mapping to send information to the ActiveCampaign API after submitting.
– Tag Name is the Tag Name List was taken in step 4.
– Field Shortcode is the shortcode in the generated field.
Example:
- Click Add item
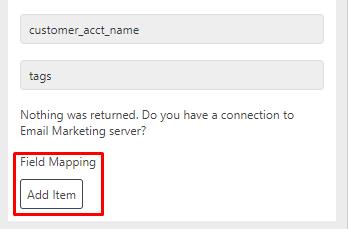
Add item
- Add Field Tag Name

Select field tag name and copy to Field Mapping
- Copy field Shortcode (ex: First name (click to First name field in form))
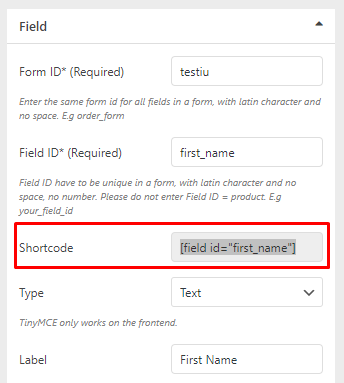
Copy field Shortcode
- Copy Shortcode to Field Shortcode
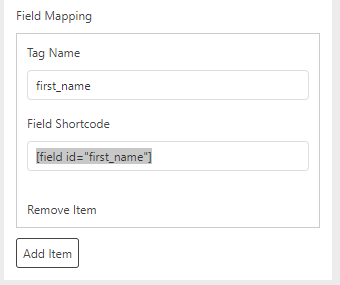
Paste shortcode to Field Mapping
- Completed all Field Shortcode
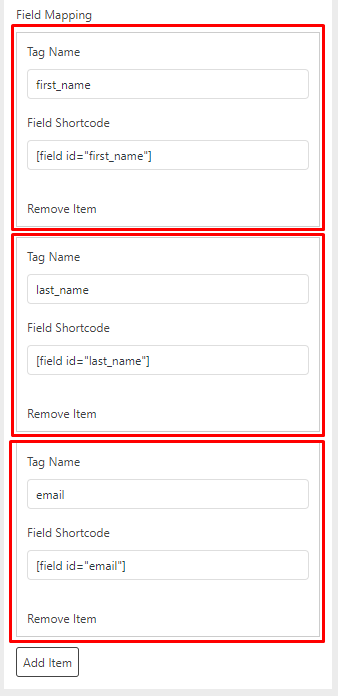
Completed add Field Mapping
Finally click save and test the active form, now your form is integrated with ActiveCampaign and ready to be used.
After filled the fields and click submit button, information will be sent to your Campaign.

